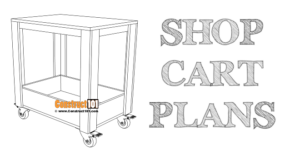
DIY rotating pegboard display. Plans include a free PDF download (link at bottom of blog post), cutting list, shopping list, measurements, and drawings.
Overview

Material List | DIY Rotating Pegboard Display

Cutting List
| Part# | Qty. | Disc. | Size |
| A | 2 | 3/4 in. plywood | 18 in. x 18 in. |
| B | 4 | 3/4 in. plywood | 1-1/2 in. x 48 in. |
| C | 4 | 3/4 in. plywood | 1-1/2 in x 16-1/8 in. |
| D | 4 | 3/4 in. plywood | 1-1/2 in. x 14-5/8 in. |
| E | 2 | pegboard | 17-5/8 in. x 48 in. |
| F | 2 | pegboard | 18 in. x 48 in. |
Shopping List
| Qty. | Disc. | Size |
| 1 | 3/4 in. plywood | 4 ft. x 4 ft. |
| 1 | pegboard | 4 ft. x 8 ft. |
| 12in. lazy susan | ||
| wood glue | ||
| finish nails | 16 gauge 1-1/2 in. | |
| staples | 18 gauge 1/2 in |

- (A) – 2 – 3/4 in. plywood – 18 in. x 18 in.

- (B) – 4 – 3/4 in. plywood – 1-1/2 in. x 48 in.

Install the corner plywood pieces (B) to the top and bottom plywood (A) using wood glue, and 1-1/2 in. finish nails, as shown on drawing above.

- (C) – 4 – 3/4 in. plywood – 1-1/2 in x 16-1/8 in.
- (D) – 4 – 3/4 in. plywood – 1-1/2 in. x 14-5/8 in.
Install (C) and (D) plywood boards as shown on drawing above, use wood glue and 1-1/2 in. finish nails.

- (E) – 2 – pegboard – 17-5/8 in. x 48 in.

(F) – 2 – pegboard – 18 in. x 48 in.

Install the pegboard using 1/2 in. staples.

Install 12 in. lazy susan.


your plans are wonderful as soon as i get paid for some of y projects i will be paying you some for these