
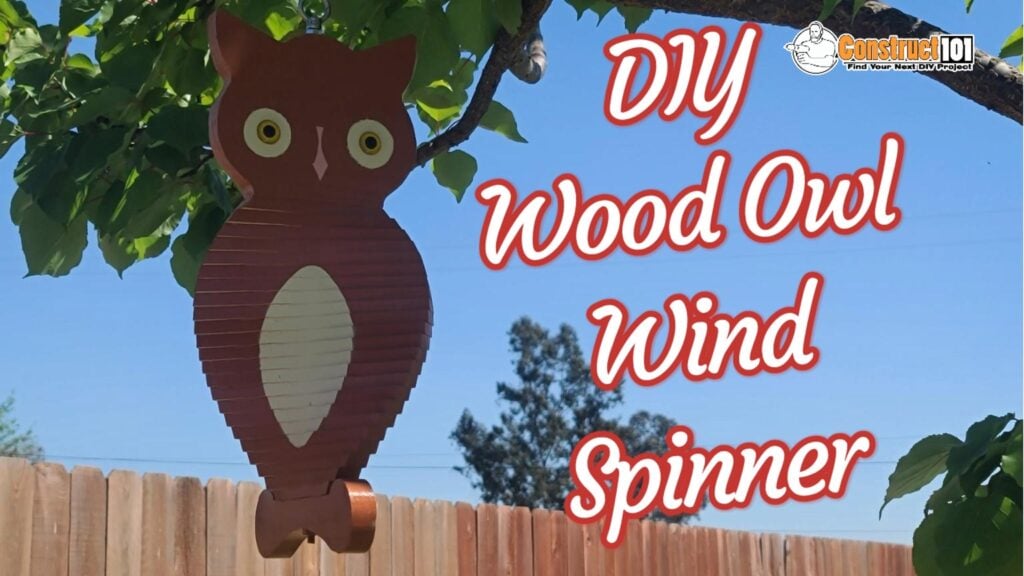
DIY wood owl wind spinner. Plans include drawings, measurements, cut out templates, shopping list, and instructions. PDF download (link at bottom of blog post).
Pictures from these plans
 | | | |
Build Video
DIY Wood Owl Wind Spinner | Material List
- 1 – 1×6 (3/4 inch x 5 1/2 inch) Board – 24 inches
- 1 – 1/4 inch 20 UNC Galvanized All Thread Rod – 16 inches
- 2 – 1/4 inch 20 UNC Hex Nut
- 1 – 1/4 inch 20 UNC Eye Nut
- 1 – Swivel Hook
- 4 – 18mm Craft Eyes
- Adhesive Spray
- Exterior Paint

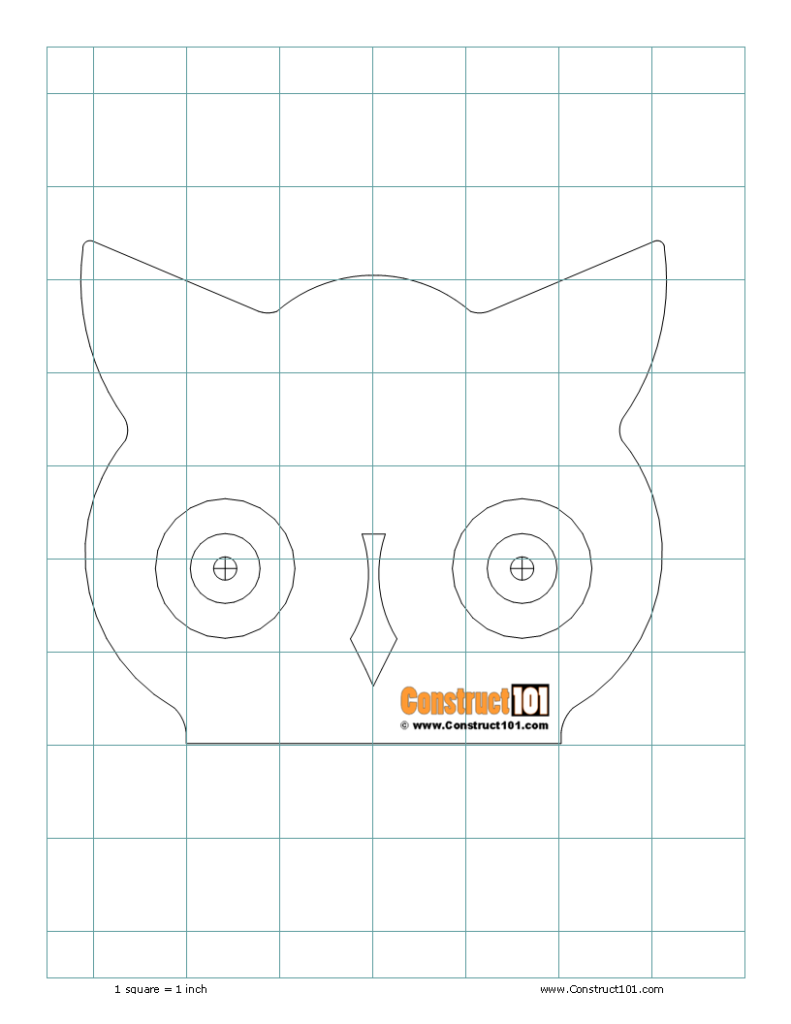
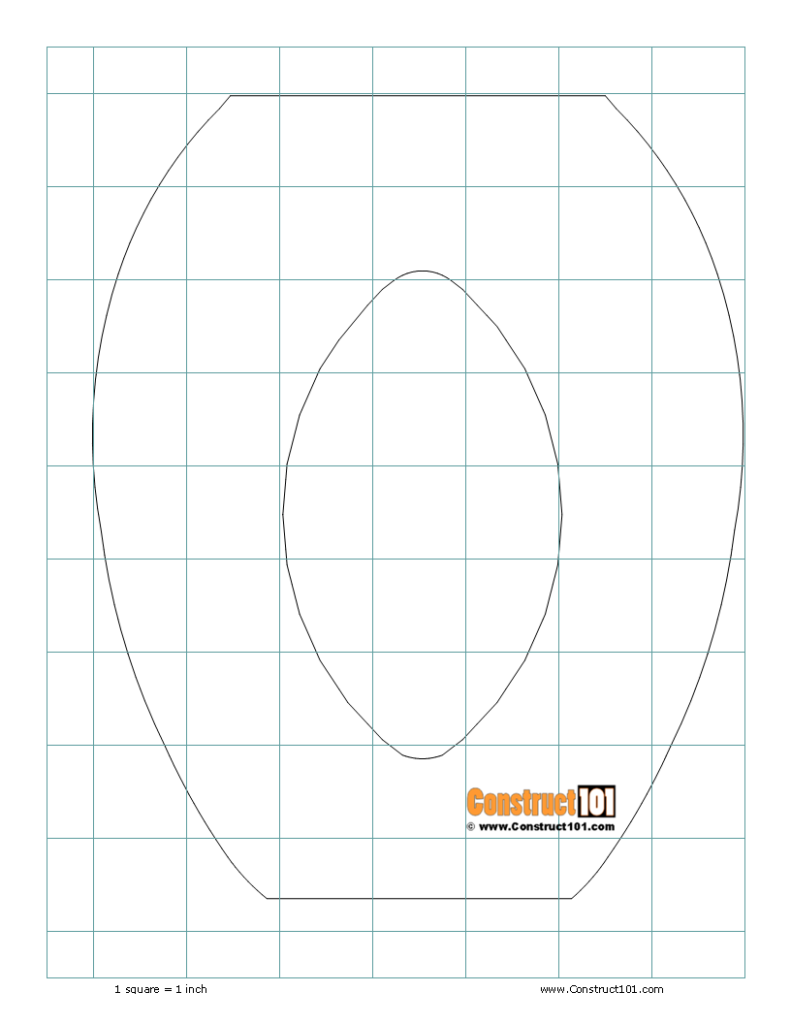
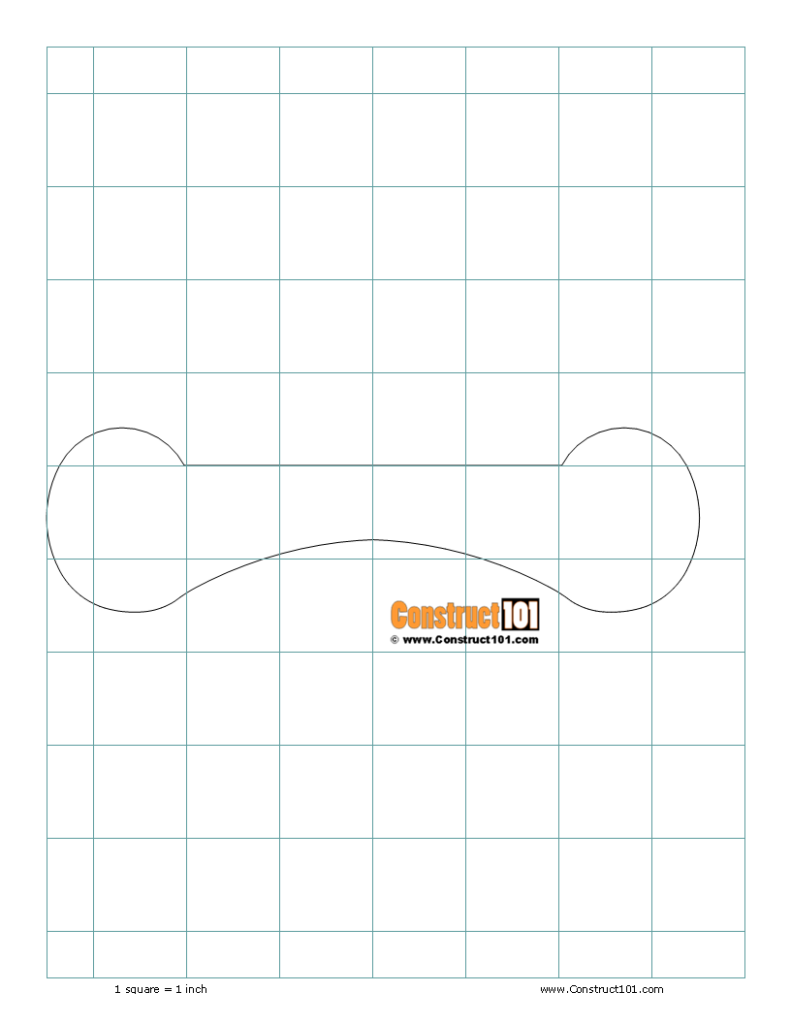
If squares on template are not measuring 1 inch, adjust the scale % size on your printer settings until squares measure 1 inch.
Use adhesive spray to attach the pattern to the wood and cut.
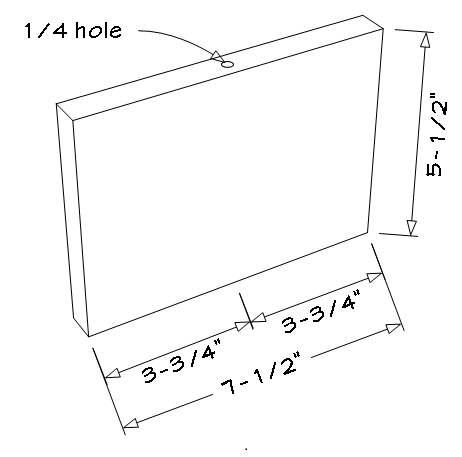
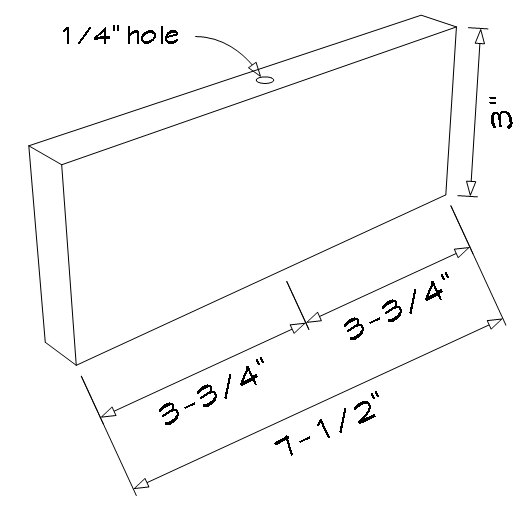
Cut a 3/4 inch board to 5 1/2 in. x 7-1/2 in.
Drill a 1/4 inch hole on the edge in the middle for the threaded rod.
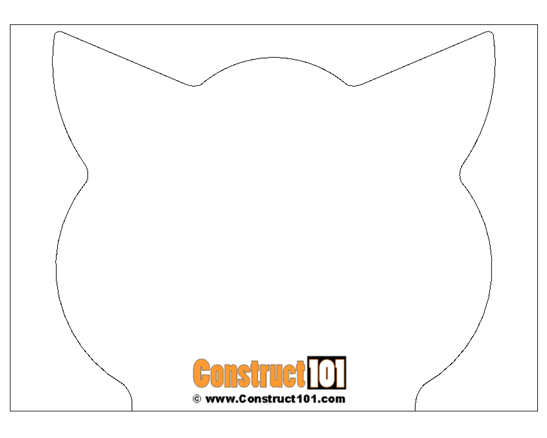
Draw out the owl head pattern using the template and cut.

Cut 23 3/4 inch board to 3/8 in. x 7-1/2 in.
Drill a 1/4 inch hole on the edge in the middle for the threaded rod.
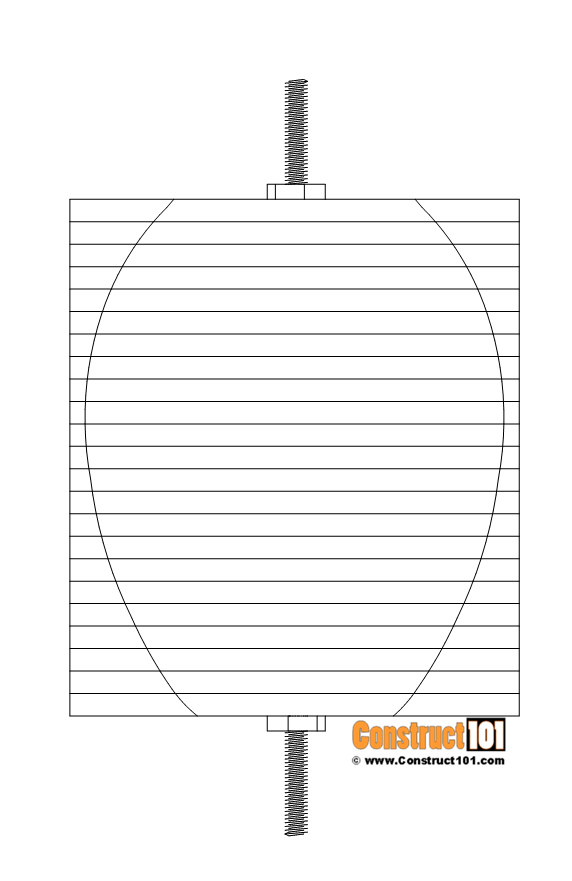
Install all the pieces through the threaded rod and tighten.
Draw out the owl body pattern using the template and cut.
Cut a 3/4 inch board to 3 in. x 7-1/2 in.
Drill a 1/4 inch hole on the edge in the middle for the threaded rod.
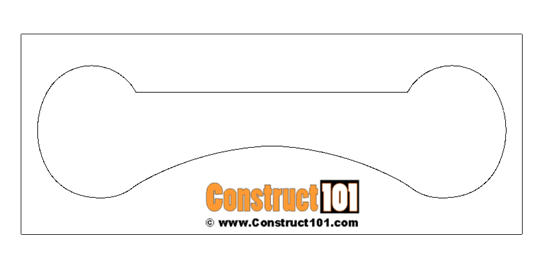
Draw out the owl feet pattern using the template and cut.
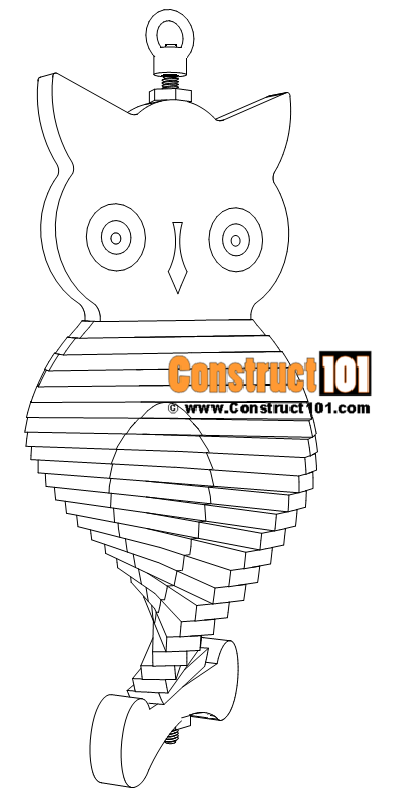
Install all parts through the threaded rod.
Install nuts and eye nut.
Sand, paint, and install eyes.


I have your plans for the owl. Don’t know how to adjust the scale. Can you help
Do you have plans to build a 7′ tall windmill base
Bjr, merci de votre retour concernant la boite à oiseaux, merci par avance
JMP
Très intéressant merci mon cardinal est heureux.