
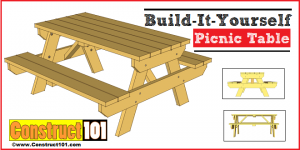
Need more seating and tables for your backyard events? why not build some picnic tables. This DIY project can be built in just one day, and it can be done cheaply.
These picnic table plans are for a traditional picnic table. Plans include a free PDF download (link at bottom of blog post), material list, shopping list, cutting list, and illustrated step-by-step building instructions.
Traditional Picnic Table Plans – Material List
Shopping List
8 – 2×6 – 10′
1 – 2×4 – 10′
3″ deck screws
16 – 3″ carriage bolt, washer, nut
Cutting List
11 – 2×6 – 60″
2 – 2×6 – 28 1/2″
4 – 2×6 – 32 5/16″
1 – 2×4 – 28 1/2″
2 – 2×4 – 24″
2 – 11 1/4″
Traditional Picnic Table Plans – Overview


Traditional Picnic Table Plans – Assembly

Cut five 2×6’s to 60″ for the table top. Cut two 2×6 to 28 1/2″ (B) the ends will have a 45 degree angle cut as shown on illustration above. Cut a 2×4 to 28 1/2″ (C). Assemble as shown on illustration above. Use 3″ deck screws, screw through the table top and into (B) and (C).

Cut four 2×6’s to 32 5/16″ for the legs (D). Cut a 23 degree angle cut on both ends facing same direction, see illustration above for details.

Install the legs as shown on illustration above. Use 3″ carriage bolts, nuts, and washers, drill holes and countersink the washer and nut.

Cut two 2×6’s to 60″ for the bench support (E). The bottom of the 2×6’s will have a 45 degree angle cut, see illustration above for details. Use clamps to hold the bench support in place, drill holes and secure with 3″ carriage bolts, washers, and nuts. Countersink the washers and nuts.

Cut two 2×4’s to 24″ for the brace (F), bevel cut the ends, see illustration above for details. Attach using 3″ deck screws, screw through the brace and into the table top and bench support.

Cut four 2×4’s to 60″ for the bench (G). Attach as shown on illustration above using 3″ deck screws. Screw through the bench and into the bench support.
Sand sharp edges and corner.


Thanks for sharing your plans, loved to build different things just need something to go by.
This is a really nice table and solid plans. I swapped out the tabletop and seats for composite decking though. I didn’t like the idea of eating on PT wood. I built mine in one Saturday. Check out my blog post about it at http://www.justmeasuringup.com/blog/time-for-a-backyard-picnic
I also used a router with a rounding over bit to smooth/bevel all the edges, which added a nice touch. And like others have mentioned, its SUPER heavy so get some help to move it.
Ash, your picnic table looks exactly like one I saw on Popular Mechanics site.
http://www.popularmechanics.com/home/how-to-plans/how-to/a6609/build-the-perfect-picnic-table/
A lot of similarities.
Very good plans exactly like mine except I run my braces to the center instead of 45 angle touch the center cross member. Bench 16 inches from floor to top .I round my tops off two inch radius on corners and benches too on outside only.
Que Maravilha!Obrigado.
Build a picnic table yesterday had basic knowledge of everything except for what angles to cut pretty good detailed diagram thanks a lot Robbie Stacy
Thank you! This is the third plan I used from your website! I had a problem with the 3″ carriage and having to use 3.5″ instead. But other then that it perfect… I made a modified Rabbit hutch into a cat patio, the cats love it. And the work bench I modified the table top using 1×6 instead of the 2×6. Nice plans.
Thank you for publishing these detailed picnic table plans. I was able to build it in about 5 hours, and it cost me about $90. It is much better looking than what the home stores are offering.
With the 32,5/16” legs the table is really short. I maybe mine with 40” legs and it is just right. Why so short?
I did this build, and increased the size of it. I love it, turned out great. Switched the Table top to 2”x10”s everything else is 2”x8”s except the angled supports underneath. Now it’s 60”x60” square with the table to standing at 32”. Made for bigger people or families.
I built this in about 3.5 hours. Nice sturdy table. Thanks for sharing.
Built this in about 3 hours. Decent table!!
Nice plans. We made 11 of them so far for our temple. We may make another 12, but considering composite.
Few modifications, used some suggestions from others.
1. Used 3.5″ carriage bolts. Too much time to countersink the 3″
2. When assembling you can use a 2×6 as a spacer while the table is upside down to place the seat support, no measuring or leveling required.
3. Using a cut list you can reduce the amount of wood by a good amount if building more than 1. Six is the perfect number where you have no wood waste. You can use extra 2×6 for the 11″ supports to avoid waste.
4. Cut the center supports with a 45′ bevel
if the top is 5x 6×2 with a 1/4 gap between = 31 inches so why does it say 28.5 inches wide ???
Because a 2×6 is 5-1/2″ wide, not 6″.
How many 2×6 should I buy ?
Very clear detailed plans. Every step well documented. A great site for diy projects.
Looking to build