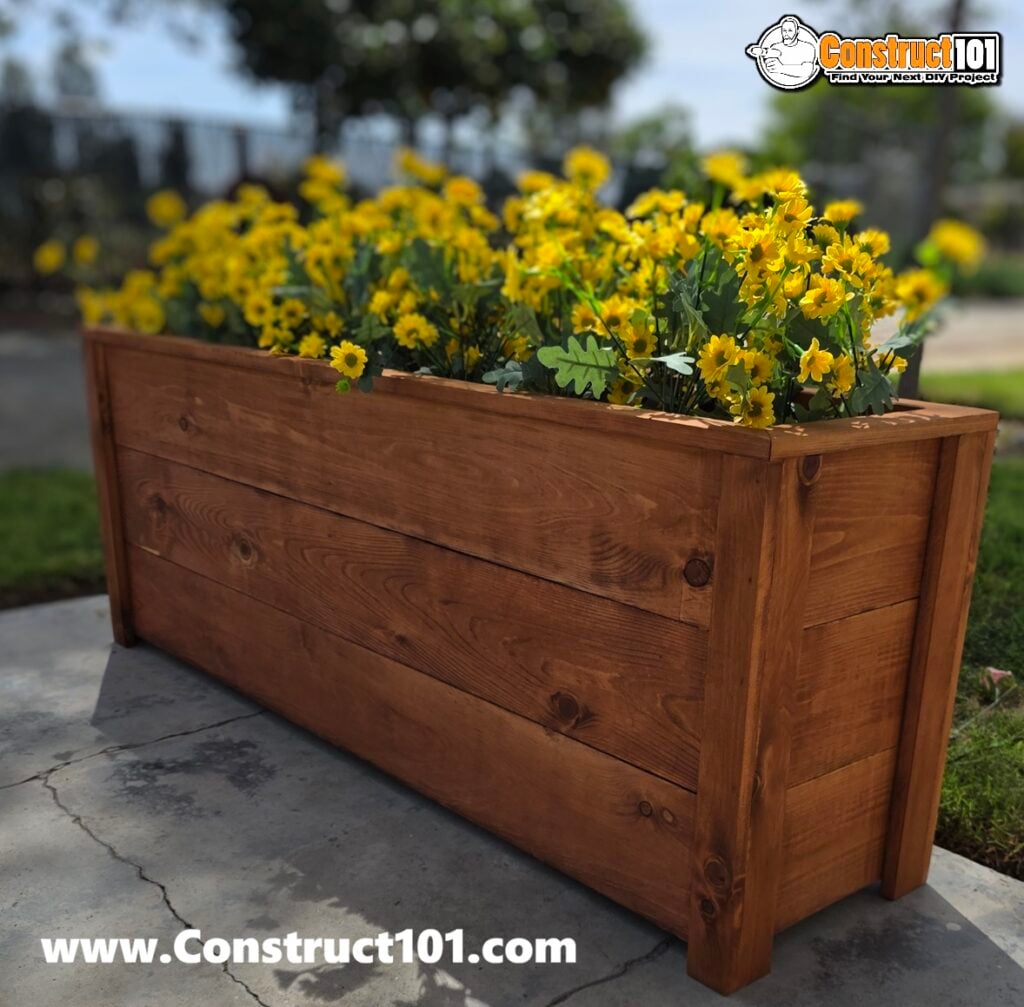
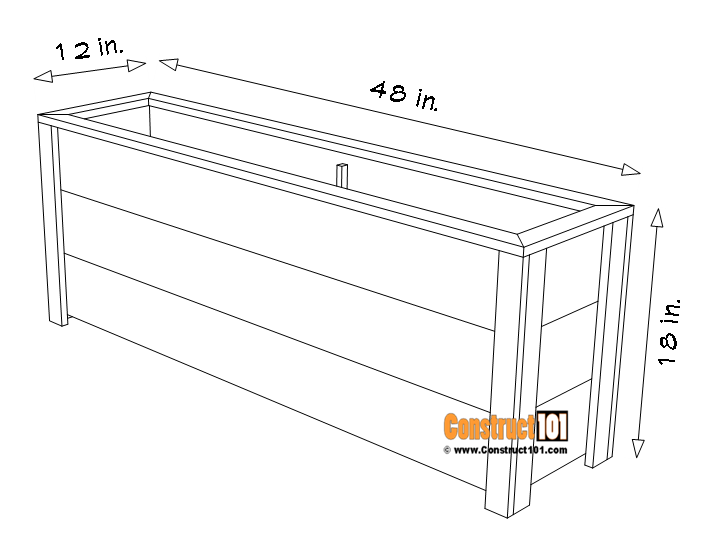
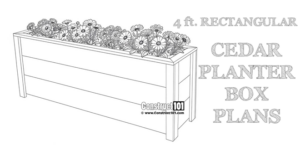
4ft. rectangular cedar planter box plans.
DIY fence board project.
Plans include a PDF download (link at bottom of post), cutting list, shopping list, measurements, drawings, and instructions.
4ft. Rectangular Cedar Planter Box Plans | Overview
Material List
Cutting List
| Parts# | Qty. | Disc. | Size |
| A | 8 | fence board | 1 3/4 in. x 17 3/8 in. |
| B | 6 | fence board | 5 1/2 in. x 46 3/4 in. |
| C | 6 | fence board | 5 1/2 in. x 9 1/2 in. |
| D | 2 | fence board | 1/2 in. x 45 1/2 in. |
| E | 9 | fence board | 5 1/2 in. x 9 1/2 in. |
| F | 2 | fence board | 1/2 in. x 14 in. |
| G | 2 | fence board | 1 3/4 in. x 48 in. 45-degree angle cut on both ends in opposite direction |
| H | 2 | fence board | 1 3/4 x 12 in. 45-degree angle cut on both ends in opposite direction |
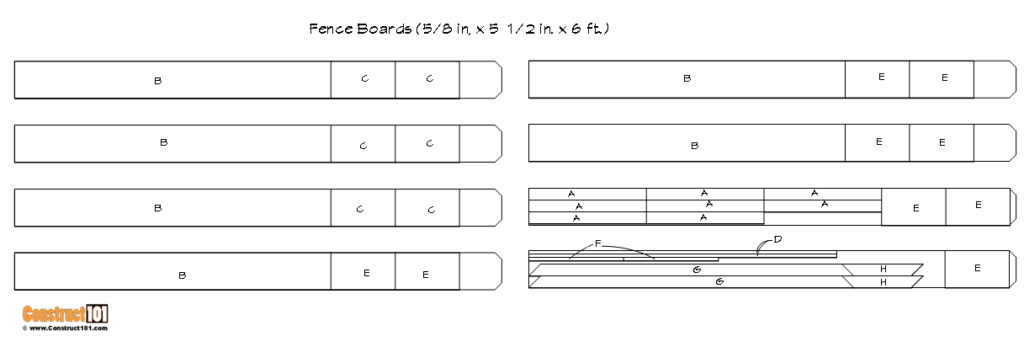
Shopping List
| Qty. | Disc. | Size |
| 8 | fence board | 5/8 in. x 5 1/2 in. x 6 ft. |
| finish nails | 1 in. galvanized 16 gauge | |
| exterior wood glue |
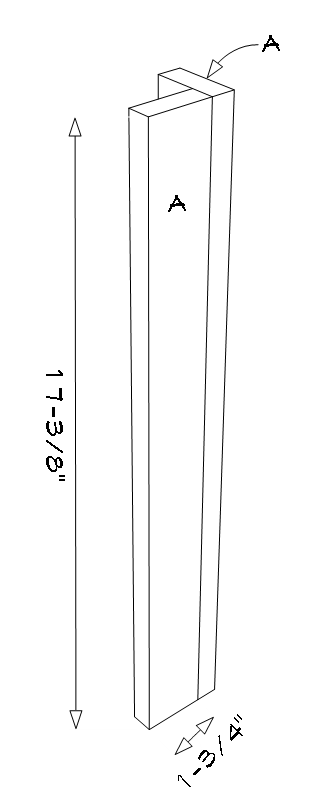
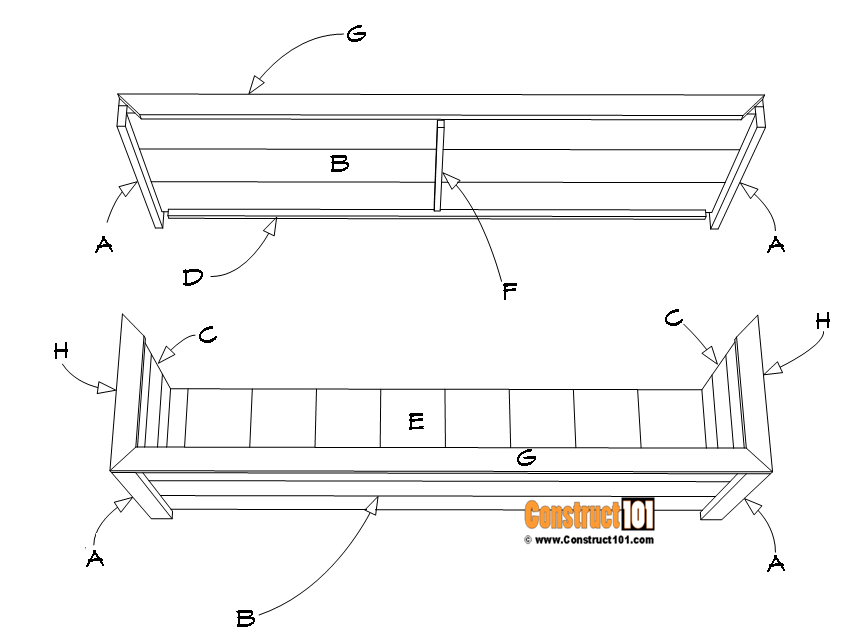
● (A) – 8 – fence board – 1 3/4 in. x 17 3/8 in.
Cut the corner supports (A) to size.
Assemble as shown on drawing using exterior wood glue and finish nails.
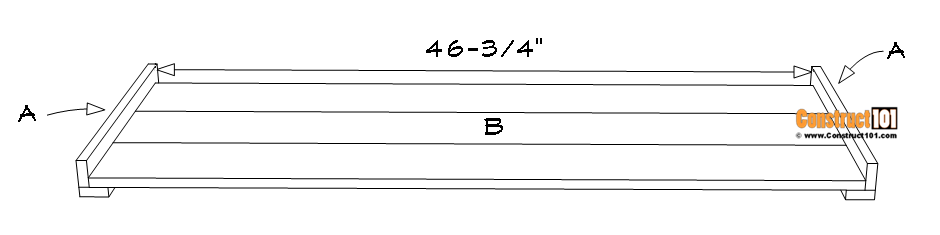
● (B) – 6 – fence board – 5 1/2 in. x 46 3/4 in.
Cut the front and back (B) to size.
Assemble as shown on drawing using exterior wood and finish nails.
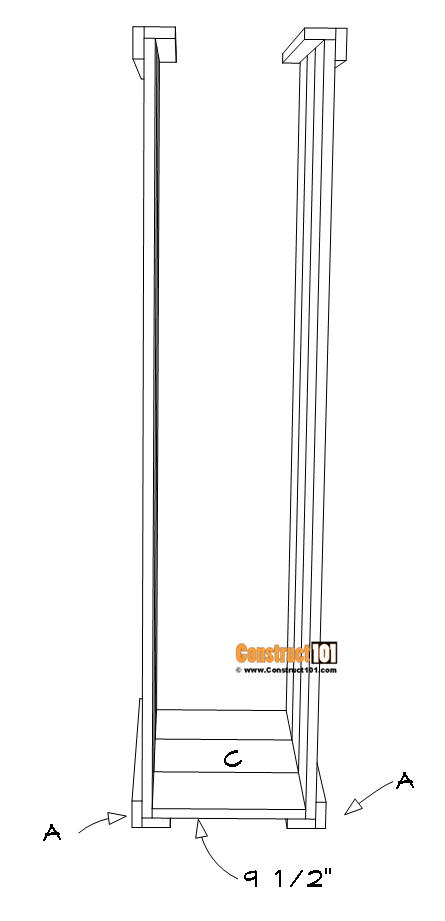
● (C) – 6 – fence board – 5 1/2 in. x 9 1/2 in.
Cut the sides (C) to size.
Assemble as shown on drawing using exterior wood glue and finish nails.
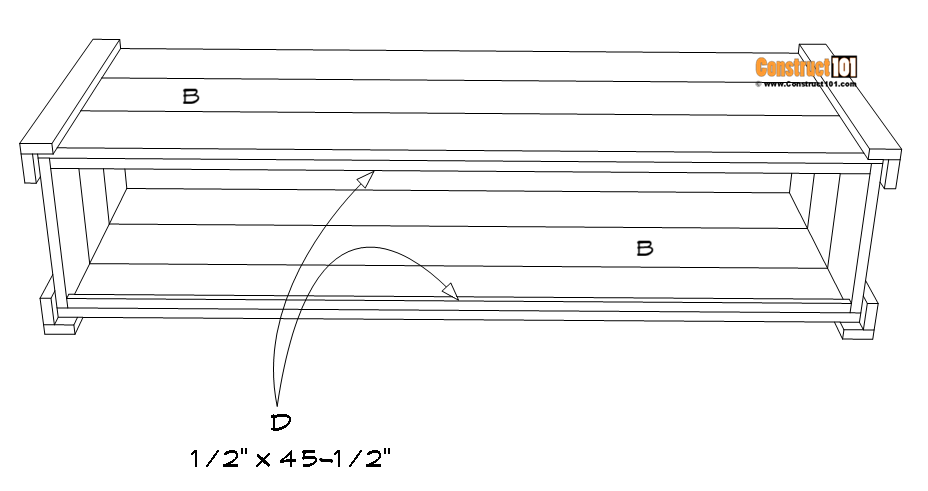
● (D) – 2 – fence board – 1/2 in. x 45 1/2 in.
Cut the bottom supports (D) to size.
Assemble as shown on drawing using exterior wood and finish nails.
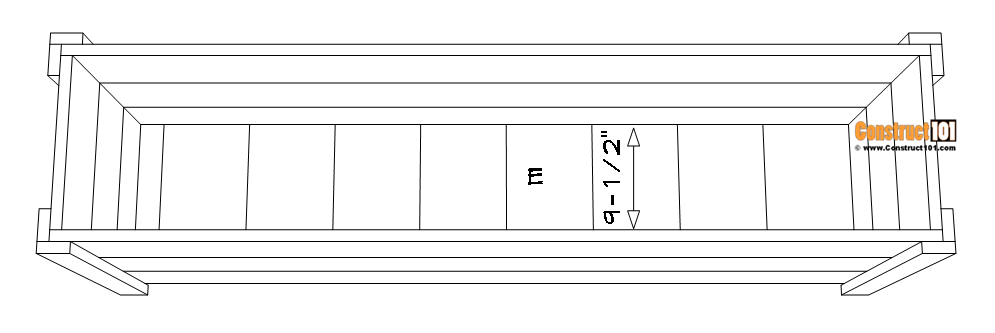
● (E) – 9 – fence board – 5 1/2 in x 9 1/2 in.
Cut the bottoms (E) to size, measure and cut the last piece to size.
Assemble as shown on drawing using exterior wood glue and finish nails.
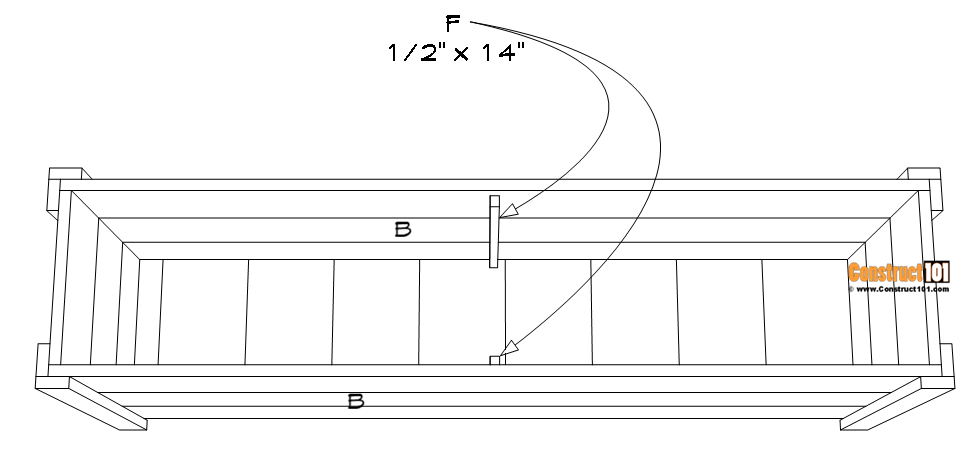
● (F) – 2 – fence board – 1/2 in. x 14 in.
Cut the front and back brace (F) to size.
Assemble as shown on drawing using exterior wood glue and finish nails.
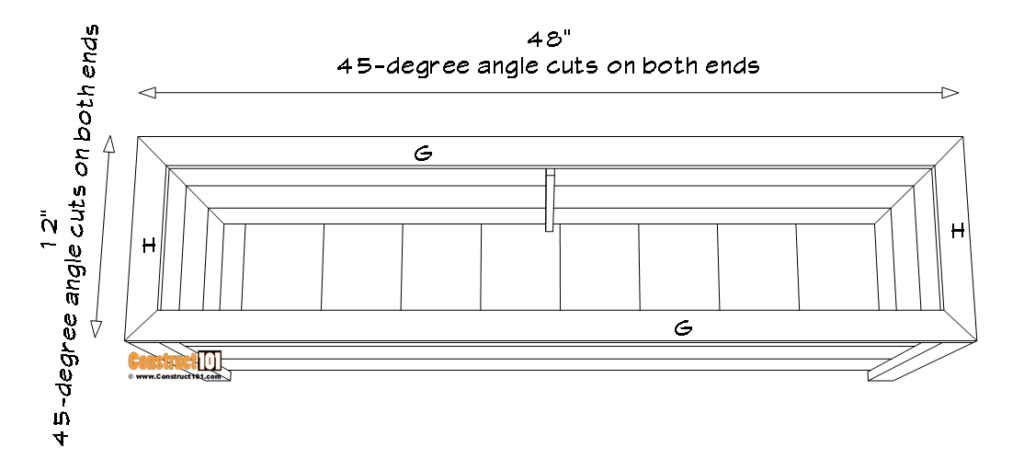
● (G) – 2 – fence board – 1 3/4 in. x 48 in. (45-degree angle cuts on both end in opposite direction).
● (H) – 2 – fence board – 1 3/4 in. x 12 in, (45-degree angle cuts on both ends in opposite direction).
Cut the front/back trim (G) to size, cut the side trim (H) to size.
Assemble as shown on drawing using exterior wood glue and finish nails.
Drill 3/4 inch holes to the bottom for drainage.
Staple plastic planter liner to bottom and sides to protect wood from moisture.
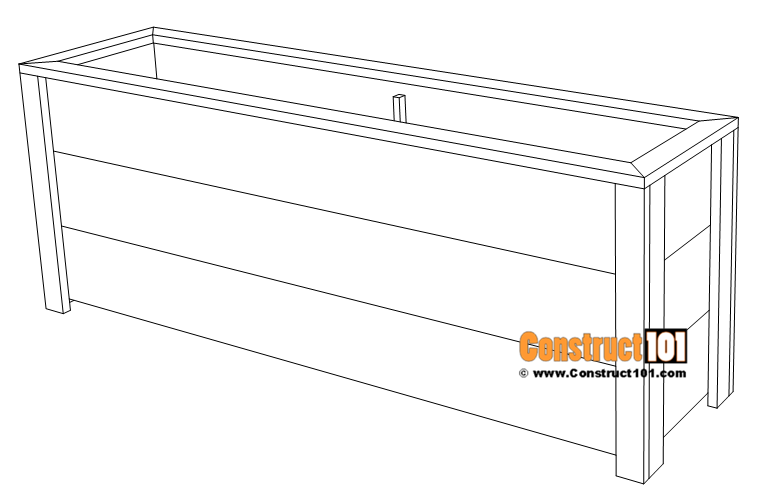
Sand, seal and stain or leave as is for a natural weathered grayish look.
-
4 ft. Rectangular Cedar Planter Box Plans | PDF Download
-

2×4 Planter Box Plans – PDF Download
-

Barn Bird House and Feeder Plans | PDF Download
Did you like this DIY project? Let me know, leave me a comment below.


