
Planters can be built in many styles but regardless of the design you choose they are sure to look great in your landscape.
Free PDF download (link at bottom of blog post).
These planter box plans where made to be easy to build using common material you can find in your depot store.
The only building material needed will be 2×4’s, 2×6’s, screws, and nails. If you have extra lumber from left over projects building some planter boxes can be the perfect use for that lumber.
This planter box can be easily modified to make it smaller or larger. Take a look at the plans below and see how easy this DIY project really is.
Planter Box Plans Material List
Shopping List
Since lumber can be purchased in different sizes the shopping list will vary.
5 – 2×6 – 8′
3 – 2×4 – 8′
3″ deck screws
2 3/4″ finishing nails
Cutting List
4 – 2×4 – 1′ 10″
4 – 2×4 – 1′ 7″
4 – 2×6 – 1′ 10″
16 – 2×6 – 1′ 6″
4 – 2×4 (ripped in half) – 1′ 8″
4 – 2×4 – 2′ 2″
Planter Box Overview

View of front and back. Planter measures 2′ 1 1/2″ on bottom and 2′ 2″ on top.
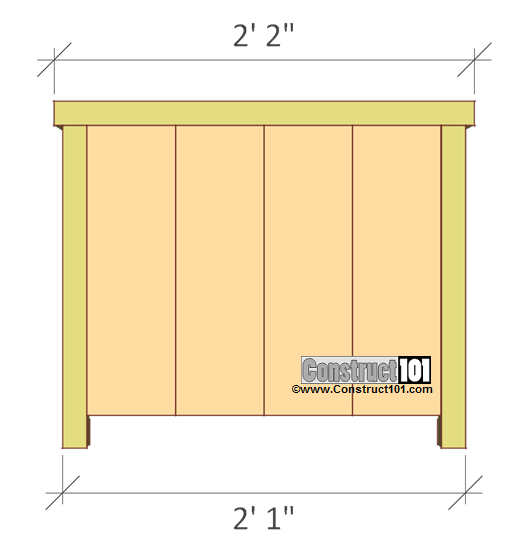
The right and left side of the planter box measures 2′ 1″ on the bottom and 2′ 2″ on the top.
Planter Box Drawings and Building Details
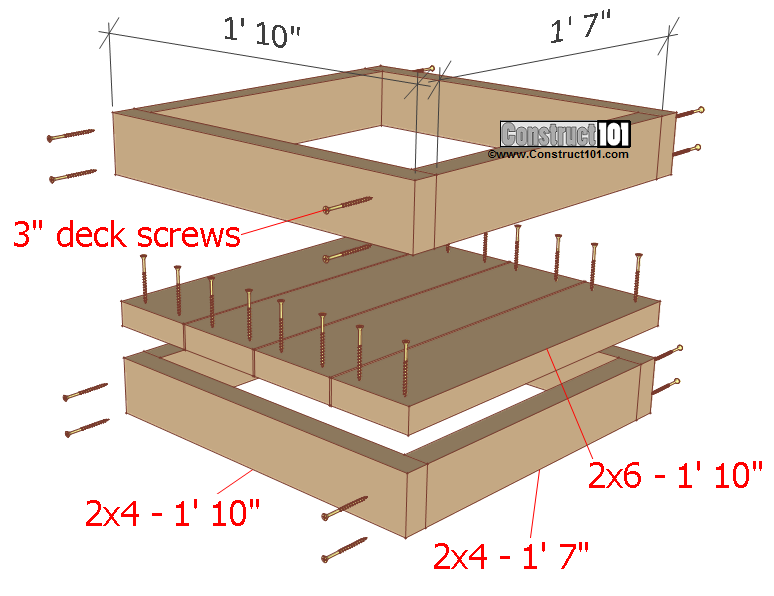
- Cut four 2×4’s to 1′ 10″
- Cut four 2×4’s to 1′ 7″
- Cut four 2×6’s to 1′ 10″ gap the 2×6 boards 1/8″, one of the 2×6 will need to be ripped to 5 1/8″.
Assemble as shown on drawing above using 3″ deck screws.
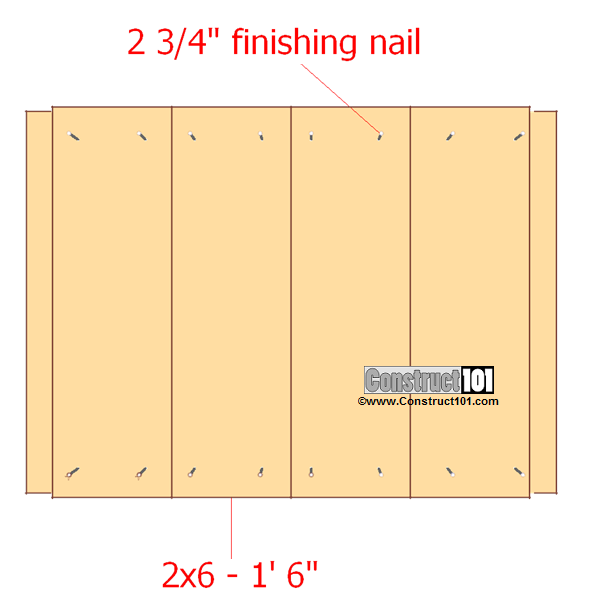
Cut sixteen 2×6’s to 1′ 6″ and install to the front, back, and sides with 2′ 3/4″ finishing nails.
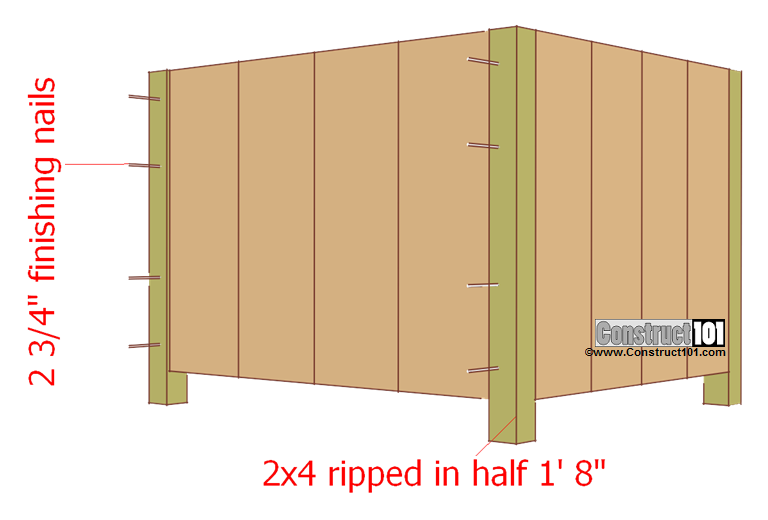
Rip a 2×4 in half and cut four pieces to 1′ 8″. Install as shown on drawing above using 2 3/4″ finishing nails.
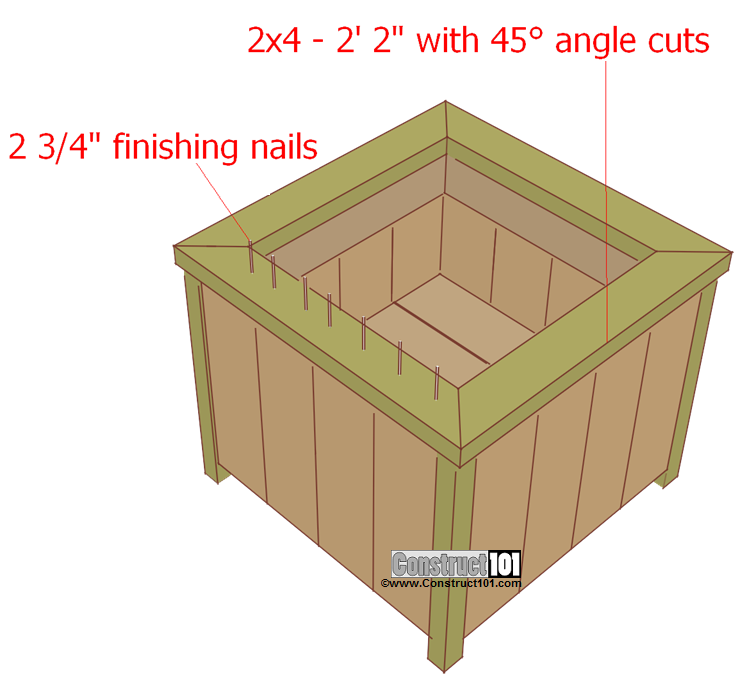
Cut four 2×4’s to 2′ 2″, cut 45 degree angel cuts on both ends facing the opposite direction. Install the 2×4 trim using 2 3/4″ finishing nails as shown on drawing above.


Great, enjoy them a lot. Looking forward to building some of your projects.
Ralph
Really like the planter box! I’m new to woodworking and crafting, your plans are great! Straight forward, easy to follow. Thank you very much!!!
I don’t see any provision for drainage. Suggest drilling a number of 1/2″ holes in the bottom and laying a piece of landscape fabric over them.
The bottom boards have a 1/8” gap, if that’s not sufficient drainage I will for sure drill some holes, thanks for the tip.
Awesome stuff!! Thanks!!
I built similar flower boxes out of left over 4′ x 8′ wood sheets from a shed I built. (so proud of myself for building that shed… especially since I had no design, just the one in my head!) On the flower boxes I built, I cut up heavy duty plastic that I had bought at Menard’s, and stapled it to the insides and the inside of the bottom of the box. I then made slits in the bottom of the plastic to allow for water drainage. The reason I used the plastic was to prevent the wet dirt from molding out and rotting the flower boxes. I also suggest that you don’t use treated lumber for the boxes as the treated lumber has a lot of chemicals in them… bad if you grow vegetables in the boxes. LOVE YOUR DESIGN!
Awesome,thank you,looking forward to next project.
How would I adjust the plans if I want the planter boxes to be about 6’x2′?
Hi,
Can you tell me how you put he corner together it doe not show on the plans.