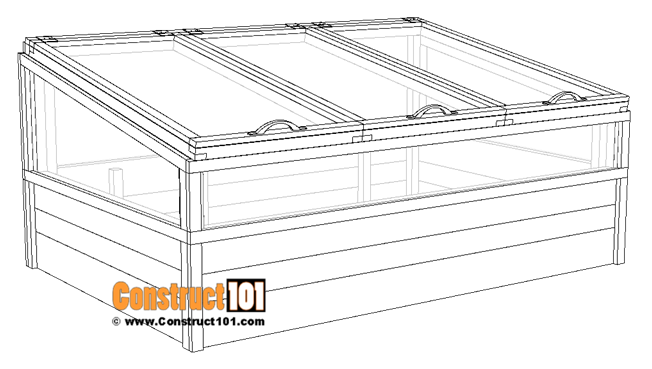
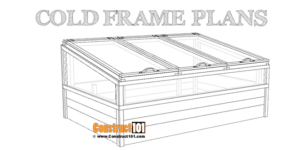
Cold frame plans, plans include a free PDF download (link at bottom of blog post), step-by-step illustrated instructions, measurements, cutting list, and shopping list.
Cold Frame Plans – Overview


Cold Frame Plans – Material List
Shopping List
| Qty | Disc. | Size |
|---|---|---|
| 6 | 2×6 | 8ft. |
| 3 | 2×4 | 8ft. |
| 11 | 2×2 | 8ft. |
| 13 | 1×2 | 8ft. |
| Hardware | ||
| deck screws | 2-1/2in. | |
| deck screws | 1-1/2in. | |
| deck screws | 1-1/4in. | |
| greenhouse plastic | ||
| staples | ||
| 6 | hinges | |
| 3 | door handle |
Cutting List
| Qty. | Disc. | Size |
|---|---|---|
| 4 | 2×6 | 45in. |
| 2 | 2×4 | 45in. |
| 2 | 2×2 | 23-1/2in. |
| 2 | 2×2 | 31-1/8in. |
| 4 | 2×6 | 72in. |
| 2 | 2×4 | 72in. |
| 4 | 2×2 | 12in. |
| 2 | 2×2 | 15-1/8in. |
| 2 | 2×2 | 7-7/16in. |
| 2 | 2×2 | 46in. |
| 2 | 2×2 | 7-3/16in. |
| 2 | 2×2 | 72in. |
| 2 | 2×2 | 16in. |
| 6 | 2×2 | 48in. |
| 6 | 2×2 | 24in. |
| 13 | 1×2 | 8ft. (cut to size) |
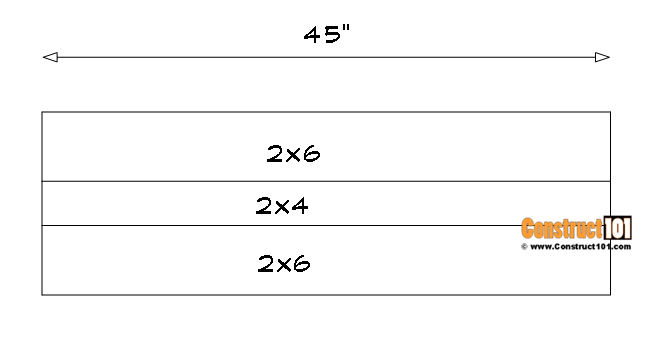
Cut four 2×6’s 45in. and two 2×4’s to 45in.
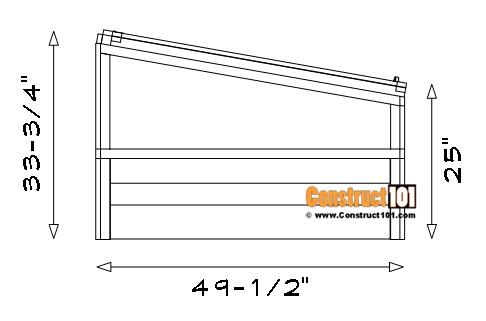
Cut two 2×2’s to 23in. the top end will have a10-degree angle cut.
Cut two 2×2’s to 31-1/8in. the top end will have a10-degree angle cut.
Drill pilot holes and screw 2-1/2 inch deck screws through the 2×2’s and into
the 2×6’s and 2×4’s.
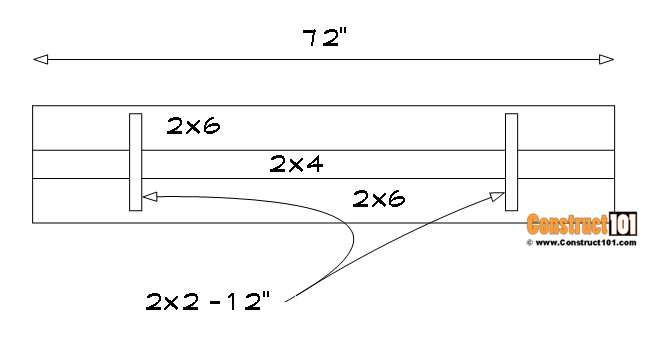
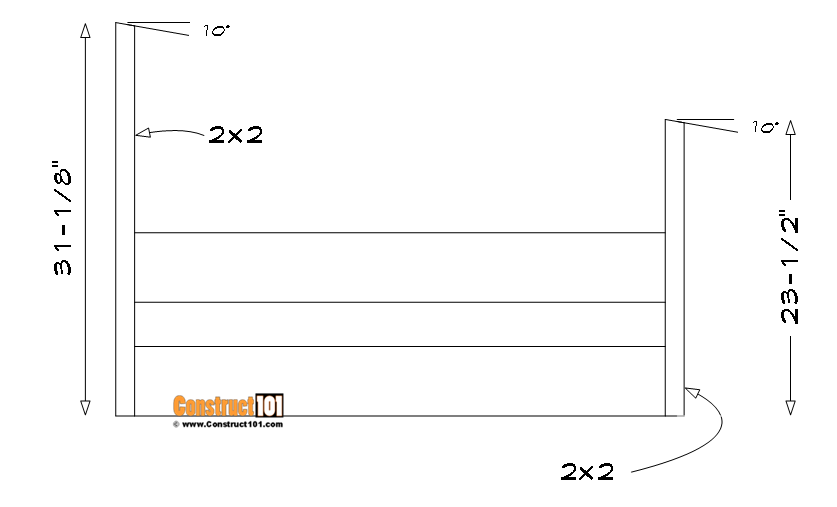
Cut four 2×6’s to 72in.
Cut two 2×4’s to 72in.
Cut four 2×2’s to 12in.
Assemble as shown on illustration above.
Drill pilot holes and screw 2-1/2in. deck screws through the 2×2’s, into the
2×6’s and 2×4’s.
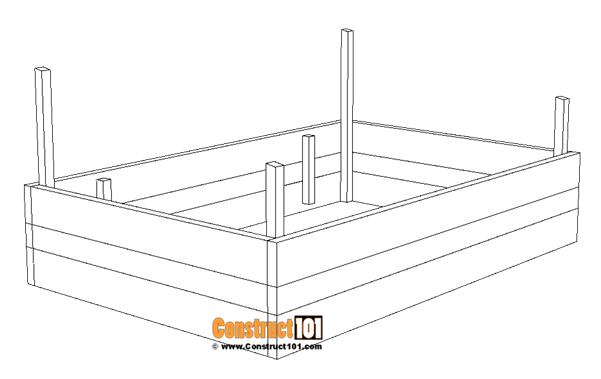
Attach the front and back to the sides as shown on illustration above using 2-1/2in. deck screws.
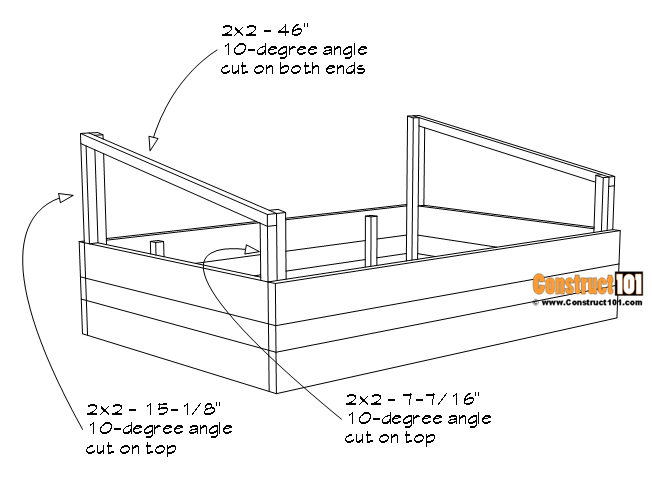
Cut the side top frame for the sides as shown on illustration.
Cut two 2×2’s to 15-1/8in. the top end will have a10-degree angle cut.
Cut two 2×2’s to 7-7/16in. the top end will have a 10-degree angle cut.
Cut two 2×2’s to 46in. cut 10-degree angle cuts on both ends.
Drill pilot holes and assemble with 2 1/2in. deck screws.
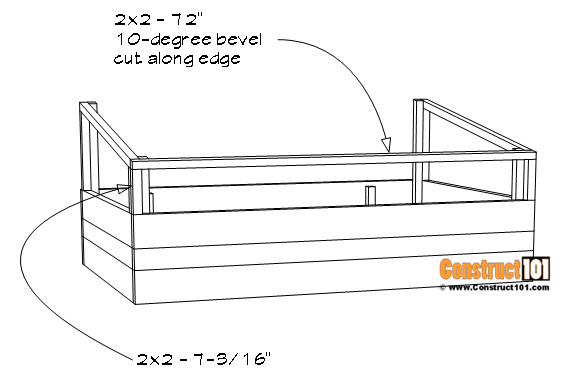
Cut the front top frame as shown on illustration above.
Cut two 2×2’s to 7-3/16in.
Cut one 2×2 to 72in. the edge will have 10-degrees bevel cut.
Drill pilot holes and assemble with 2-1/2in. deck screws.
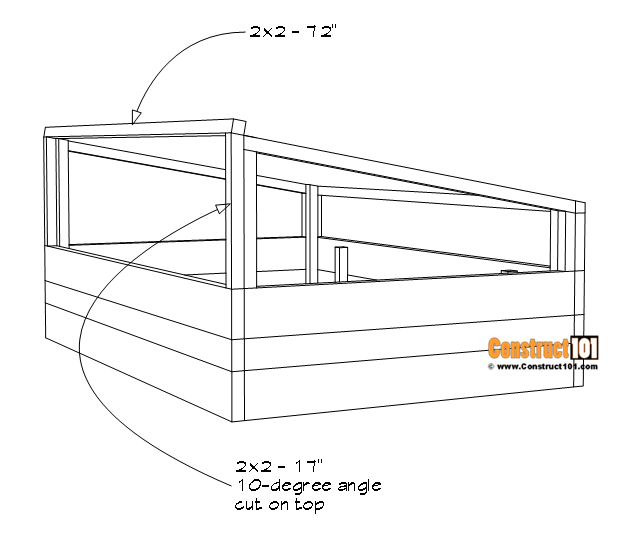
Cut the back-top frame as shown on illustration above.
Cut two 2×2’s to 17in. the top end will have a 10-degree angle cut.
Cut one 2×2 to 72in.
Drill pilot holes and assemble with 2-1/2in. deck screws.
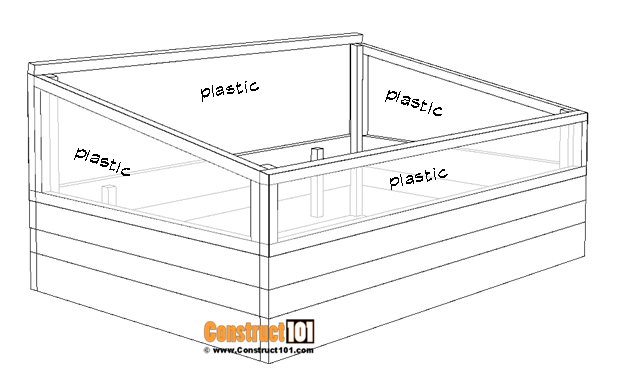
Cut plastic to size and attach as shown on illustration above using staples.
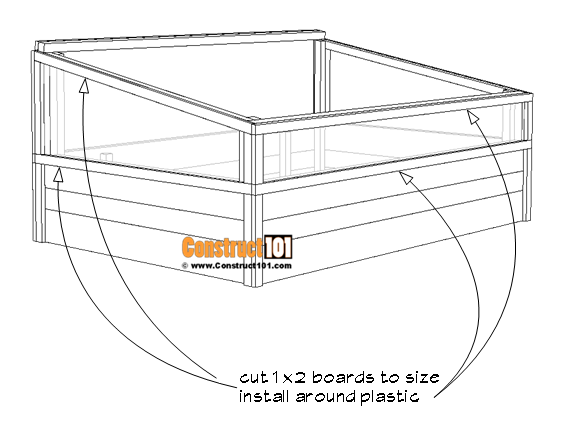
Cut 1×2’s to size and install over plastic.
Drill pilot holes and use 1-1/2in. deck screws to secure the 1×2 boards.
Cut 1×2’s to size for the corners.
Drill pilot holes and screw 1-1/2in. deck screws through the 1×2’s and into the front, back, and side boards.
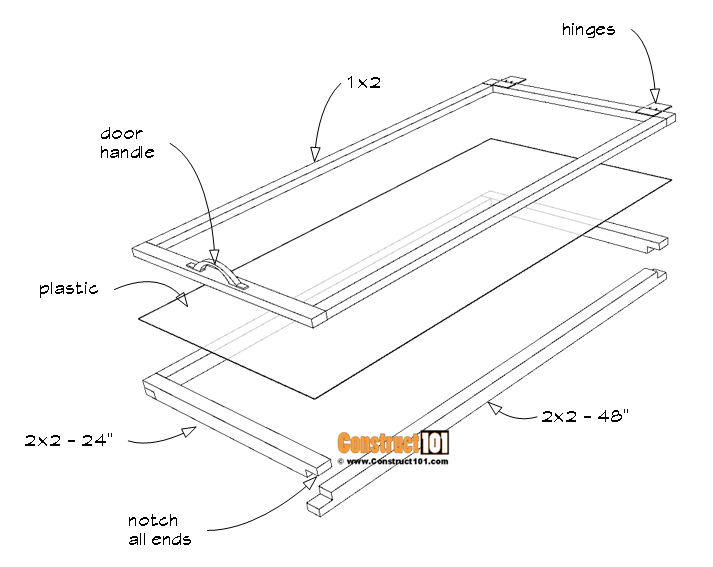
Cut the following material to size to build three doors.
Cut six 2×2’s to 48in.
Cut six 2×2’s to 24in.
Notch all the ends on the 2×2’s as shown on illustration.
Drill pilot holes and assemble the door frames using 1-1/4in. deck screws.
Cut plastic to size and staple to the door frames.
Cut 1×2’s to size and attach over plastic.
Drill pilot holes and use 1-1/2in. deck screws to secure the 1×2 boards in place.
Attach the hinges and handles.
Attach doors to the cold frame.
Paint/stain to protect wood from the elements.
Staple plastic to the inside to protect wood from moisture.


In the section with the 3rd picture, you say to “cut four 2×2’s to 1′ long and install as shown on illustration above”. These 1″ 2x2s appear in all subsequent pictures, but you never state why these are needed. It doesn’t look like anything rests on them.
Why is this step needed?
Looks like the are for structural integrity, perhaps to help keep things from bowing or seperating over the long hall?