
Picnic table plans detached benches, plans includes step-by-step details with illustrations, shopping list, cutting list, and free PDF download (link at bottom of blog post).
Picnic Table Plans Detached Benches – Overview


Picnic Table Plans Detached Benches – Material List
Shopping List
Shopping List
TABLE
4 – 2×4 – 8′
2 – 2×6 – 10′
1 – 2×6 – 8′
3″ deck screws
BENCH
2 – 2×10 – 10′
3″ deck screws
Cutting List
Cutting List
TABLE
(A) 4- 2×4 – 3′ 1/8″
(B) 3 – 2×4 – 2′ 4 1/2″
(C) 5 – 2×6 – 5′
(D) 2 – 2×4 – 2′
BENCH
2 – 2×10 – 5′
4 – 2×10 – 1′ 4″
4 – 2×10 – 7″
Table
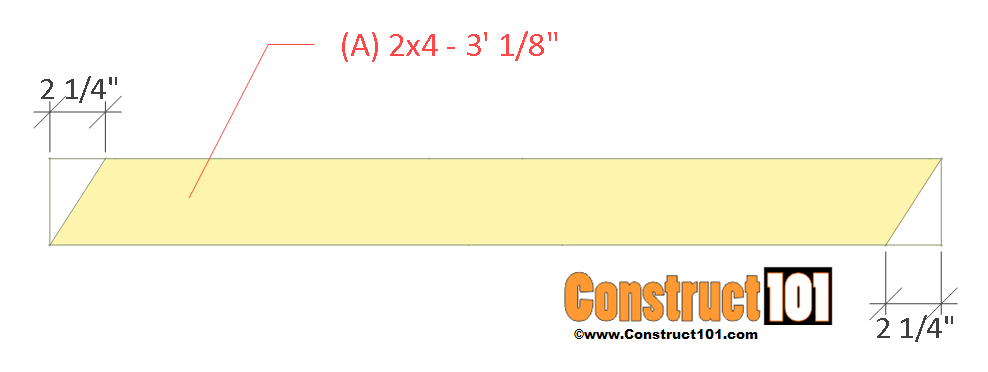
Cut four 2×4’s (A) to 3′ 1/8″ for the legs. Cut the ends of the legs as shown on illustration above.

Position two legs as shown on illustration above and assemble.

Cut three 2×4’s (B) to 2′ 4 1/2″ for the top supports. Cut the ends of the 2×4’s as shown on illustration above.
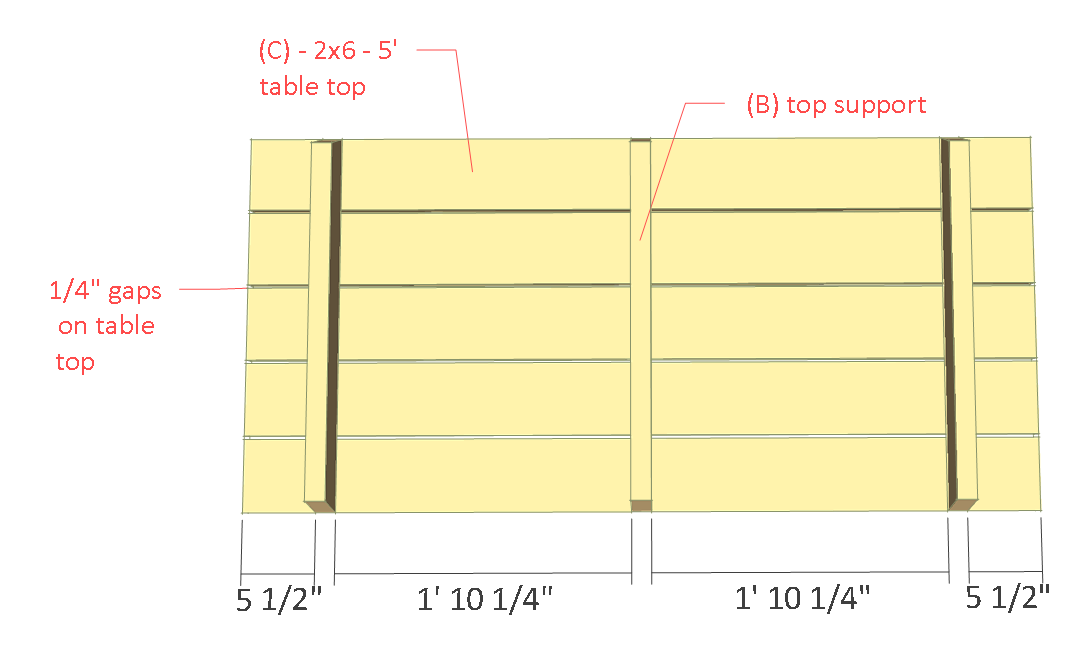
Cut five 2×6’s (C) to 5′ for the table top. Assemble as shown on illustration above. Screw 3″ deck screws through the table top (C) and into the top supports (B).

Turn table upside down and assemble the legs as shown on illustration above.
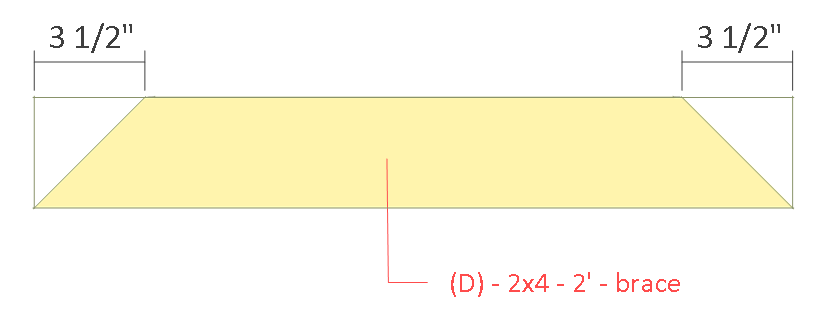
Cut two 2×4’s (D) to 2′ for the brace. Cut the ends of the 2×4’s as shown on illustration above.

Install the brace (D) as shown in illustration above. Screw 3″ deck at an angle through the brace and into the table top and legs.
Bench
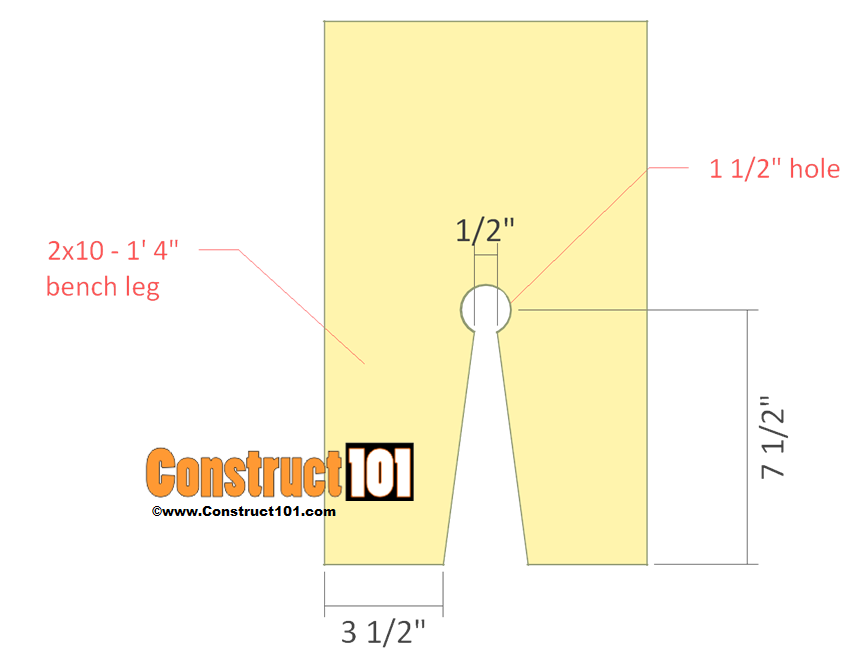
Cut four 2×10’s to 1′ 4″ for the bench legs. Cut the bench legs as shown on illustration above.

Cut two 2×10 to 5′ for the bench top. Screw 3″ deck screws through the bench top and into the legs.
Next cut four 2×10’s to 7″ for the bench brace, cut 45° bevel cuts to the edges. Install as shown on illustration above using 3″ deck screws.


Your site is just great for Handy men and beginners alike, your plans are well designed easy to follow.Thank You.M
Hi good day.
I love all about this website. The free plans with the material lists and everything but its difficult to work with feet and inches where as im use to the metric system.
Is there any chance that we can have the plans on the metric system.
Thank you in advance
Kurt
My anti-virus won’t let me down load the PDF file, plans. I have drawn the plans on a piece of paper and hope that I can read my wife’s husband’s drawings.
How do I “notch” the 2×4 legs for the table so that they make a stable and well fitting leg assembly in your “picnic table with separate benches” plans?
Thanks.
Great plans except I think that 3″ carriage bolts are too short to attach the legs to the table (has to go through 2 2×3″ with would be 3″). I suggest getting 8 3.5″ carriage bolts for attaching the legs. You can use shorter carriage bolts for creating the ‘X’ of the legs.
Otherwise, thank you very much.